The Encounter Note is a report or a description of the patient’s details that are recorded for each visit and are maintained for future reference. The format of these Encounter notes can be configured in this section. The Encounter note has 2 formats. They are:
| • | Report Format – The charting elements are displayed in tabular form with the details. |
| • | Delimited & Descriptive Format – The charting elements are seen one after another, with details, on the Encounter Note. |
To configure a Encounter Note template:
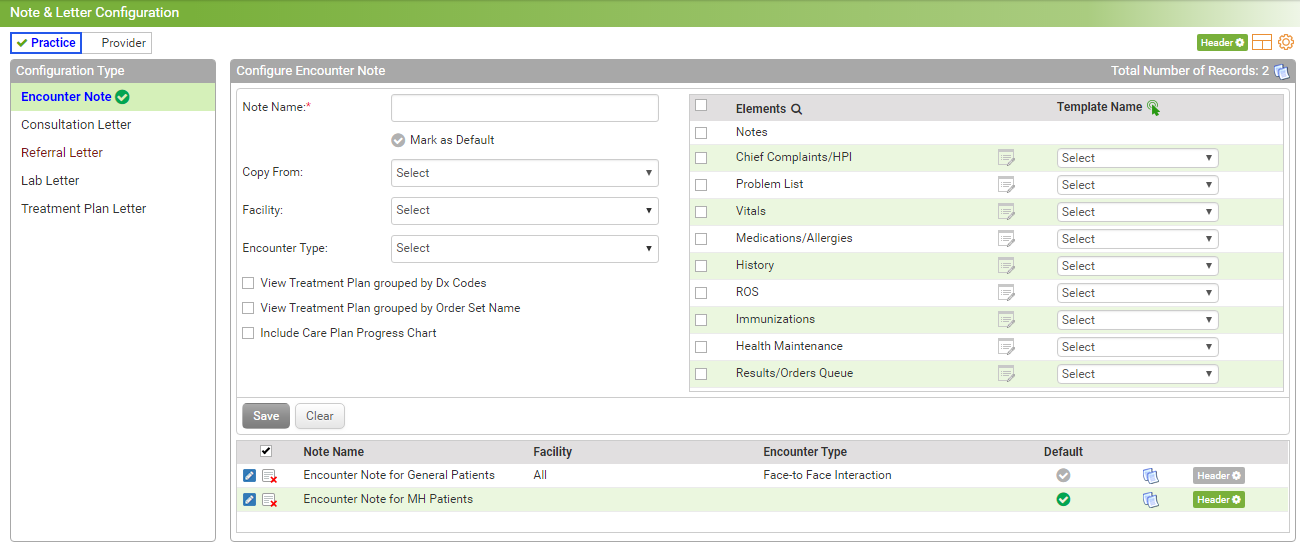
| 1. | From the left menu items, click Administration > EMR > Note & Letter Configuration. The Note & Letter Configuration screen is displayed. |
| 2. | In the Configuration Type section, the Encounter Note is selected by default. |
| 3. | In the Configure Encounter Note section, do the following: |
| • | Enter the Note Name, select Facility & Encounter Type from the drop-down list and click Save. You can also copy the note/letter from the existing notes/letters you have configured for other providers. |
| • | Select the elements you want to configure. From the adjacent drop-down list, select the template for each element. In the templates, separators (comma, colon, new line, and so forth) are configured to separate the text on Encounter Note. |
| • | To use the same template for all the elements, you can click the icon  from header. from header. |
| • | To add default description for the element, click the default description icon  for that element. for that element. |
| • | The notes you configure will appear in the grid. You can edit or inactivate them as per your requirement. |
| • | Click the edit icon  to edit the details of that note. to edit the details of that note. |
| • | Click the inactivate icon  to inactivate the note type. Deselect the Active Note Types check box to view the list of inactive note types. Click the activate icon to inactivate the note type. Deselect the Active Note Types check box to view the list of inactive note types. Click the activate icon  to reactivate the corresponding note type. to reactivate the corresponding note type. |
| • | Click the default icon  to set that encounter note as default. to set that encounter note as default. |
| • | Click the copy icon  to copy the details from one provider to another provider. to copy the details from one provider to another provider. |
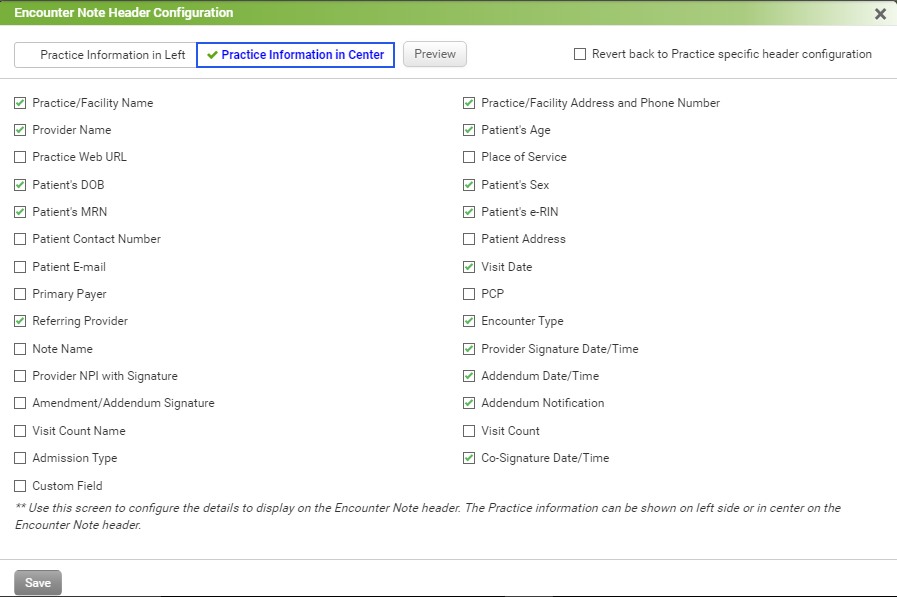
| • | Click the header icon  to configure the header that you want to print on that specific Encounter Note. For example, you may want to print Practice Web URL on Note 1 but not on Note 2, you can do that with the help of this button. to configure the header that you want to print on that specific Encounter Note. For example, you may want to print Practice Web URL on Note 1 but not on Note 2, you can do that with the help of this button. |
| • | Click the icon  to configure descriptive encounter note template. You can also configure various templates for different separators (comma, colon, new line, and so forth) to be used to separate the text on Encounter Note. to configure descriptive encounter note template. You can also configure various templates for different separators (comma, colon, new line, and so forth) to be used to separate the text on Encounter Note. |
| • | Click the customized preference icon  to set font name, size, and margins on the Encounter Note. to set font name, size, and margins on the Encounter Note. |
| • | Select 'View Treatment Plan grouped by Dx Codes' check box to view Treatment Plan items grouped by diagnosis codes in the Encounter Note. |
| • | Select 'View Treatment Plan grouped by Order Set Name' check box to view Treatment Plan items grouped by Order Set Name in the Encounter Note. |
| • | Select 'Include Care Plan Progress Chart' check box to view progress chart in the Encounter Note. |


